OneNote is your very own digital notebook | |
Your OneNote Class Notebook is organized into three parts: Student Notebooks -- a private notebook shared between the teacher and each individual student. Teachers can access every student notebook, while students can see only their own. Content Library -- a read-only notebook where teachers can share handouts with students. Collaboration Space -- a notebook for everyone in your class to share, organize, and collaborate.
|  |
 OneNote for Classroom Use--works great on an iPad! OneNote for Classroom Use--works great on an iPad!
 One Note Getting Started Video One Note Getting Started Video
 One Note for Teachers One Note for Teachers
 How to Write Notes Slides How to Write Notes Slides
 Plan a Trip with Others Plan a Trip with Others
 Search Notes Instantly Search Notes Instantly
One Note Clip from the Web
Atomic Learning Videos about OneNote | Launch the app, log in to your K-12 Email account, and you'll see an attractive layout, complete with a spiral-notebook theme. In landscape mode, your notebooks and notes are listed in the left column, with the current note you're viewing on the right. In portrait mode, a page of a spiral notebook fills the screen, with your list of notebooks and notes available by tapping the button in the upper-left corner. No matter the orientation, three buttons--to delete, e-mail, and create notes--reside in the upper-right corner of the screen.  Screenshot by Matt Elliott/CNET Screenshot by Matt Elliott/CNETIn OneNote's scheme, a notebook is filled with sections, and sections are filled with notes. The app starts you off with one default notebook, strangely named Personal (Web). OneNote for iPad's biggest limitation is the inability to create new notebooks or sections. You can only create notes (using the create button in the upper-right corner), which you can save as unfiled or in the section you are currently viewing. If you want to move a note to a new section or notebook or create a new section or notebook, you'll need to use the PC or Web app. You also need the PC or Web app to tag notes, another useful and basic feature that is not included with the app. While organizing notes is limited because you can't move notes around or create new notebooks, the app makes it easy to delete a note. From the list of notes on the left, simply swipe sideways on a note and a red delete button appears. At the bottom of this column are four buttons: Notebooks, Unfiled, Recents, and Search. The Notebooks button shows you all of your notebooks. It shows the Personal (Web) notebook and any others you created using the OneNote PC or Web app. The Unfiled button shows you a list of notes you created but didn't save to a specific section or notebook. Unfortunately, you can't drag notes from the Unfiled list to another section or notebook within the iPad app. The Recents button shows you all of your recently created or edited notes. Tap the white pin icon to the right of a note and it gets pinned to the top of the Recents list, where it'll stay until you unpin it. Lastly, the Search button lets you search by keyword, but you can't search by date or even view notes in chronological order (you can't view the date of a note without opening it).  Screenshot by Matt Elliott/CNET Screenshot by Matt Elliott/CNETOneNote uses the standard iPad onscreen keyboard, with three additional buttons. One creates a check box next to a line of text, which you can then tap when that item is completed. The second button creates bulleted lists, and the third lets you embed a photos into a note, either by snapping one yourself right from the app or selected a shot from your library. That's it for additional controls. Formatting options such as font, font size, and font color are not offered. There is no linking support, and you can't insert audio clips. And while you can created bulleted and checkmark lists, you can't create a numbered list without doing it manually. Lastly, you can't highlight an entire page or more than one paragraph, which makes it difficult copy and paste or generally rearrange text.  Screenshot by Matt Elliott/CNET Screenshot by Matt Elliott/CNETYou can access settings by tapping on the gear-icon button, which is accessible from the home screen of the Notebooks view.
|
Navigate to the SharePoint site where you'll create your class notebooks. Login is your K-12 email and email password  Click OneNote Class Notebook.  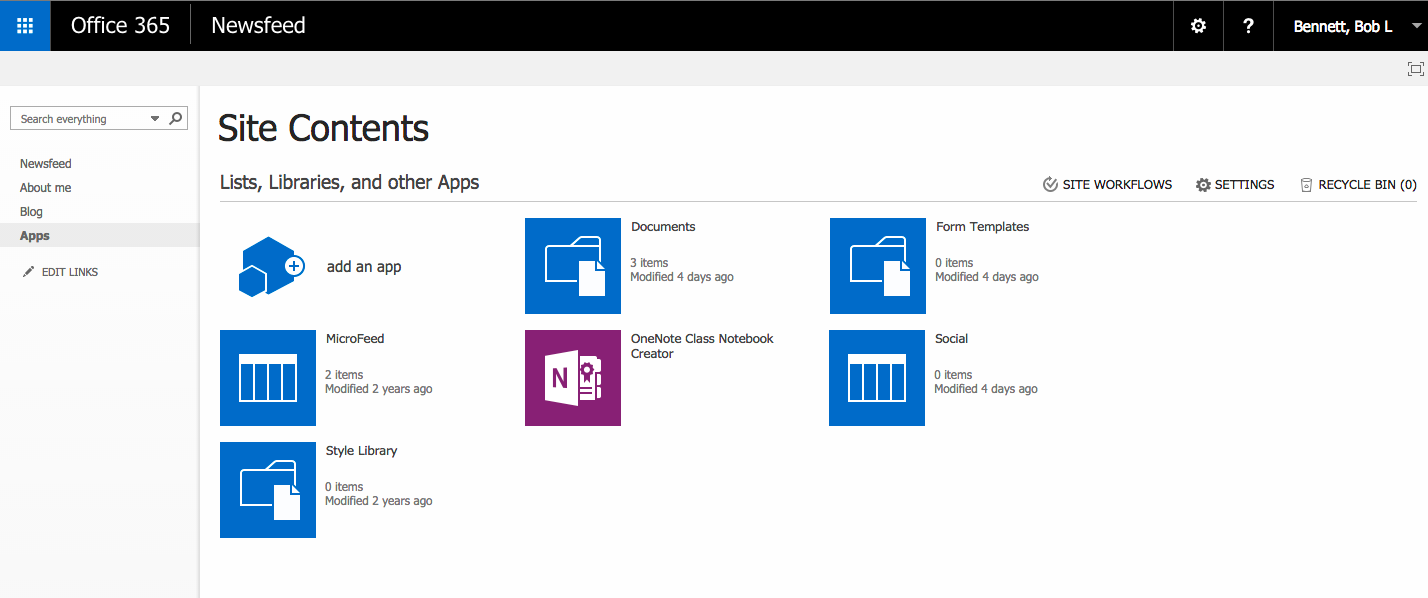
Create a class notebookClick Create a class notebook from the available options.  Name your new notebook, and then click Next. TIP We recommend that you create a separate notebook for each class. For example, if you teach multiple Spanish 2 classes, create a notebook for each class. Give each notebook a unique name that is easy for you and your students to identify. You might name the notebooks “Spanish 2 P1” for your 1st period class, “Spanish 2 P2” for your 2nd period class, and so on. NOTE Each notebook you create must have a unique name, and it cannot contain these characters # / * ? " | < > : . % ' \. 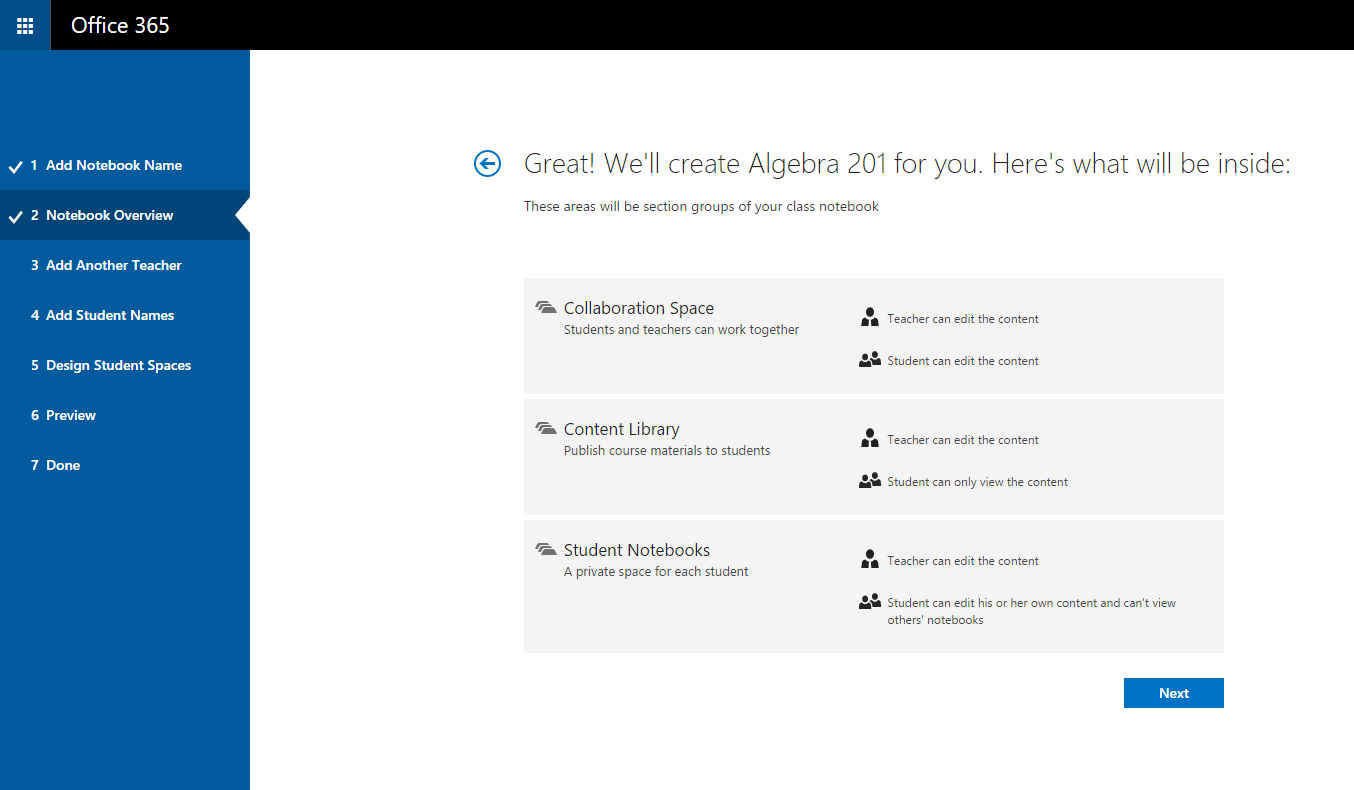
(Optional) Add another teacher to your class notebookOn this screen, you have the option to add another teacher to your class notebook. Any teacher added will have th same permissions as you do. You can add as many as you'd like. Add your students to your class notebookYou can add your students individually or in bulk. NOTE Your students must have an Office 365 organization account to continue with this step. If you aren't sure whether or not they do, ask your IT Administrator. Add Students IndividuallyType a student's name in the text box, then press Enter. TIP As you type, the app will look up possible matches. For example, you can type “Carl” and it will find any students matching that name.  Repeat step 1 until you've added all of your students, and then click Next.
Add Students in BulkCopy and paste a list of the students' names, separated by a semicolon (;) into the text box. TIP After you paste the students' names into the text box, the app will look up each name. The app may take a few moments to automatically resolve each name. For each match that isn't found, you can retype the name or remove the name from the text box. 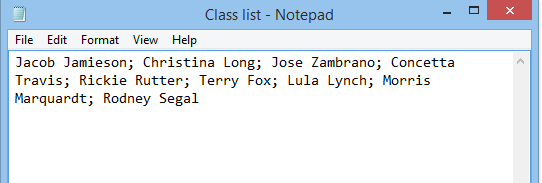 Click Next when you’ve completed adding all of your students for the class and the names have fully resolved.
Start each student notebook with sectionsKeep the boxes checked next to the default sections that you would like created in each student’s notebook. 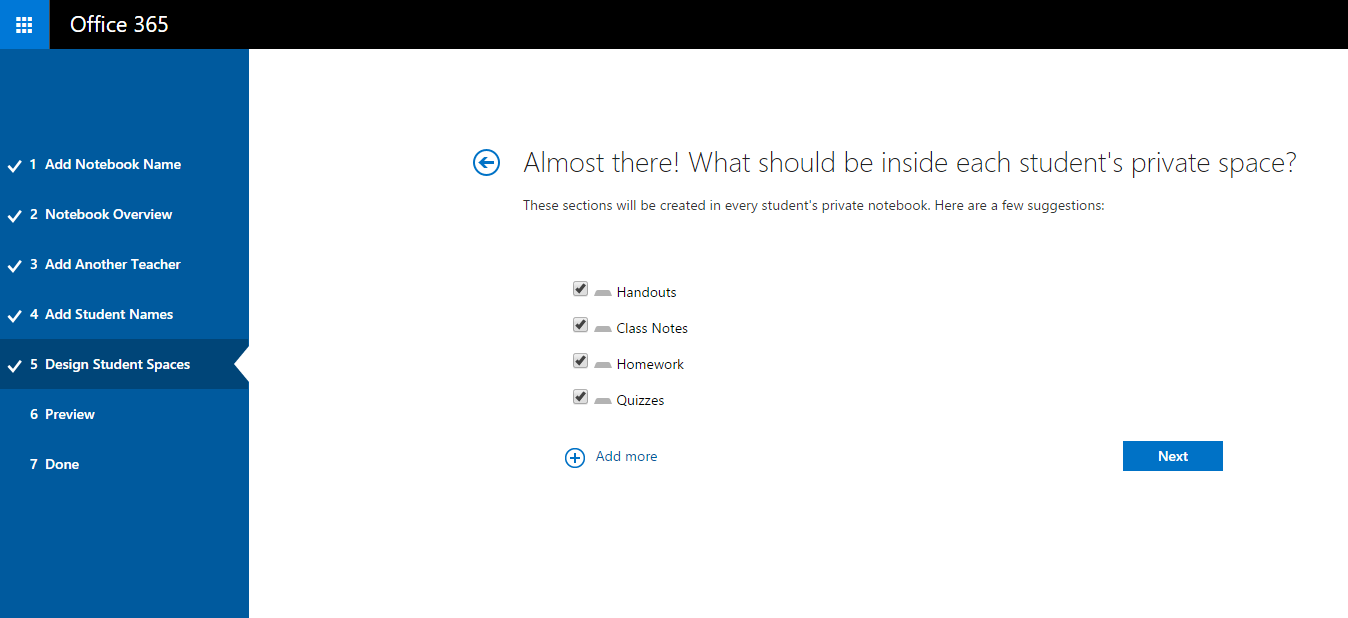 Click Add more to add additional sections in each student’s notebook. Click Next when finished. TIP We recommend that you create section names that correspond to activities, not units. For example, use activities such as Handouts, Class Notes, and Quizzes. The reason for this is that students work in one unit at a time; it will take longer to find items of interest in a unit section. NOTE You can also add, remove, and delete sections directly in your students’ notebooks after the class notebook is created.
Finalize Your Class NotebookClick Teacher's notebook, and Student's notebook to verify how the sub-notebooks and sections will be created for the class. Click  to go back to add or remove sections, or click Create to have the app create your class notebook. to go back to add or remove sections, or click Create to have the app create your class notebook. 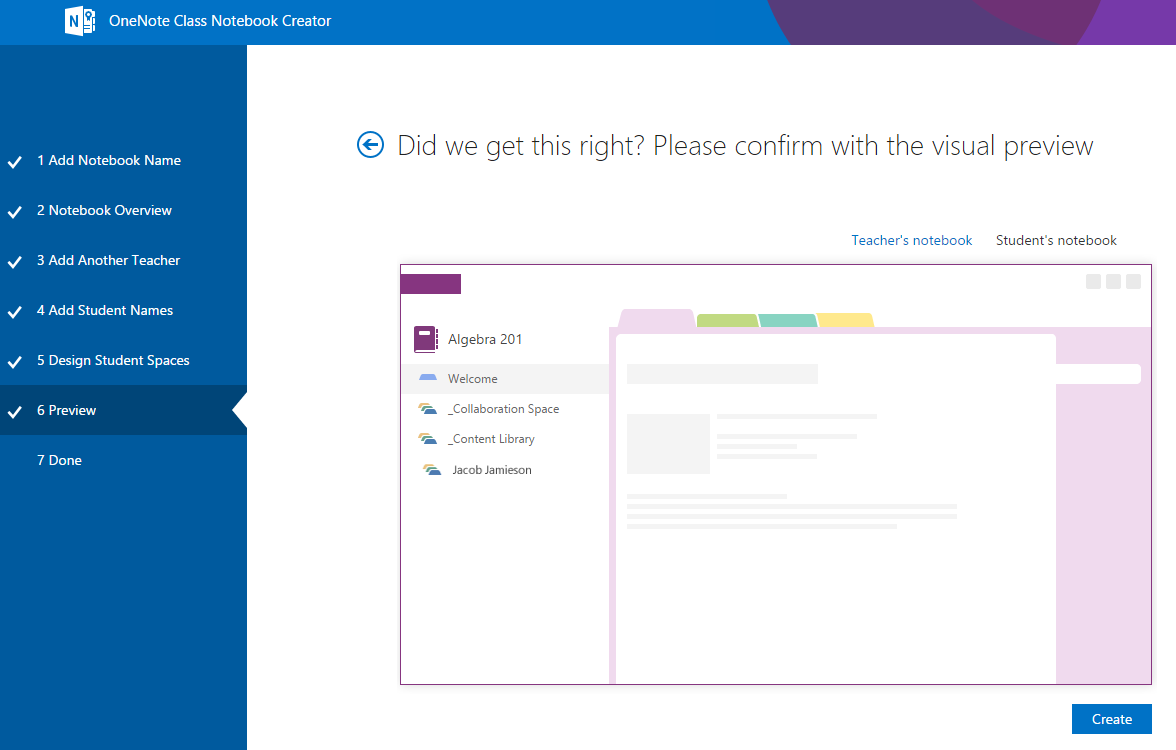 Click the notebook name link to open your class notebook in OneNote. Once the notebook is ready for your students, email the hyperlink shown in the text box to your class for your students to open. Keep a copy of this link for your records or retrieve this link later in OneNote 2013 by right-clicking the class notebook in the notebook list, and then clicking Copy Link to Notebook. TIP The same link is used by everyone in one class to access the class notebook. If you make notebooks for several classes, each link will be different. 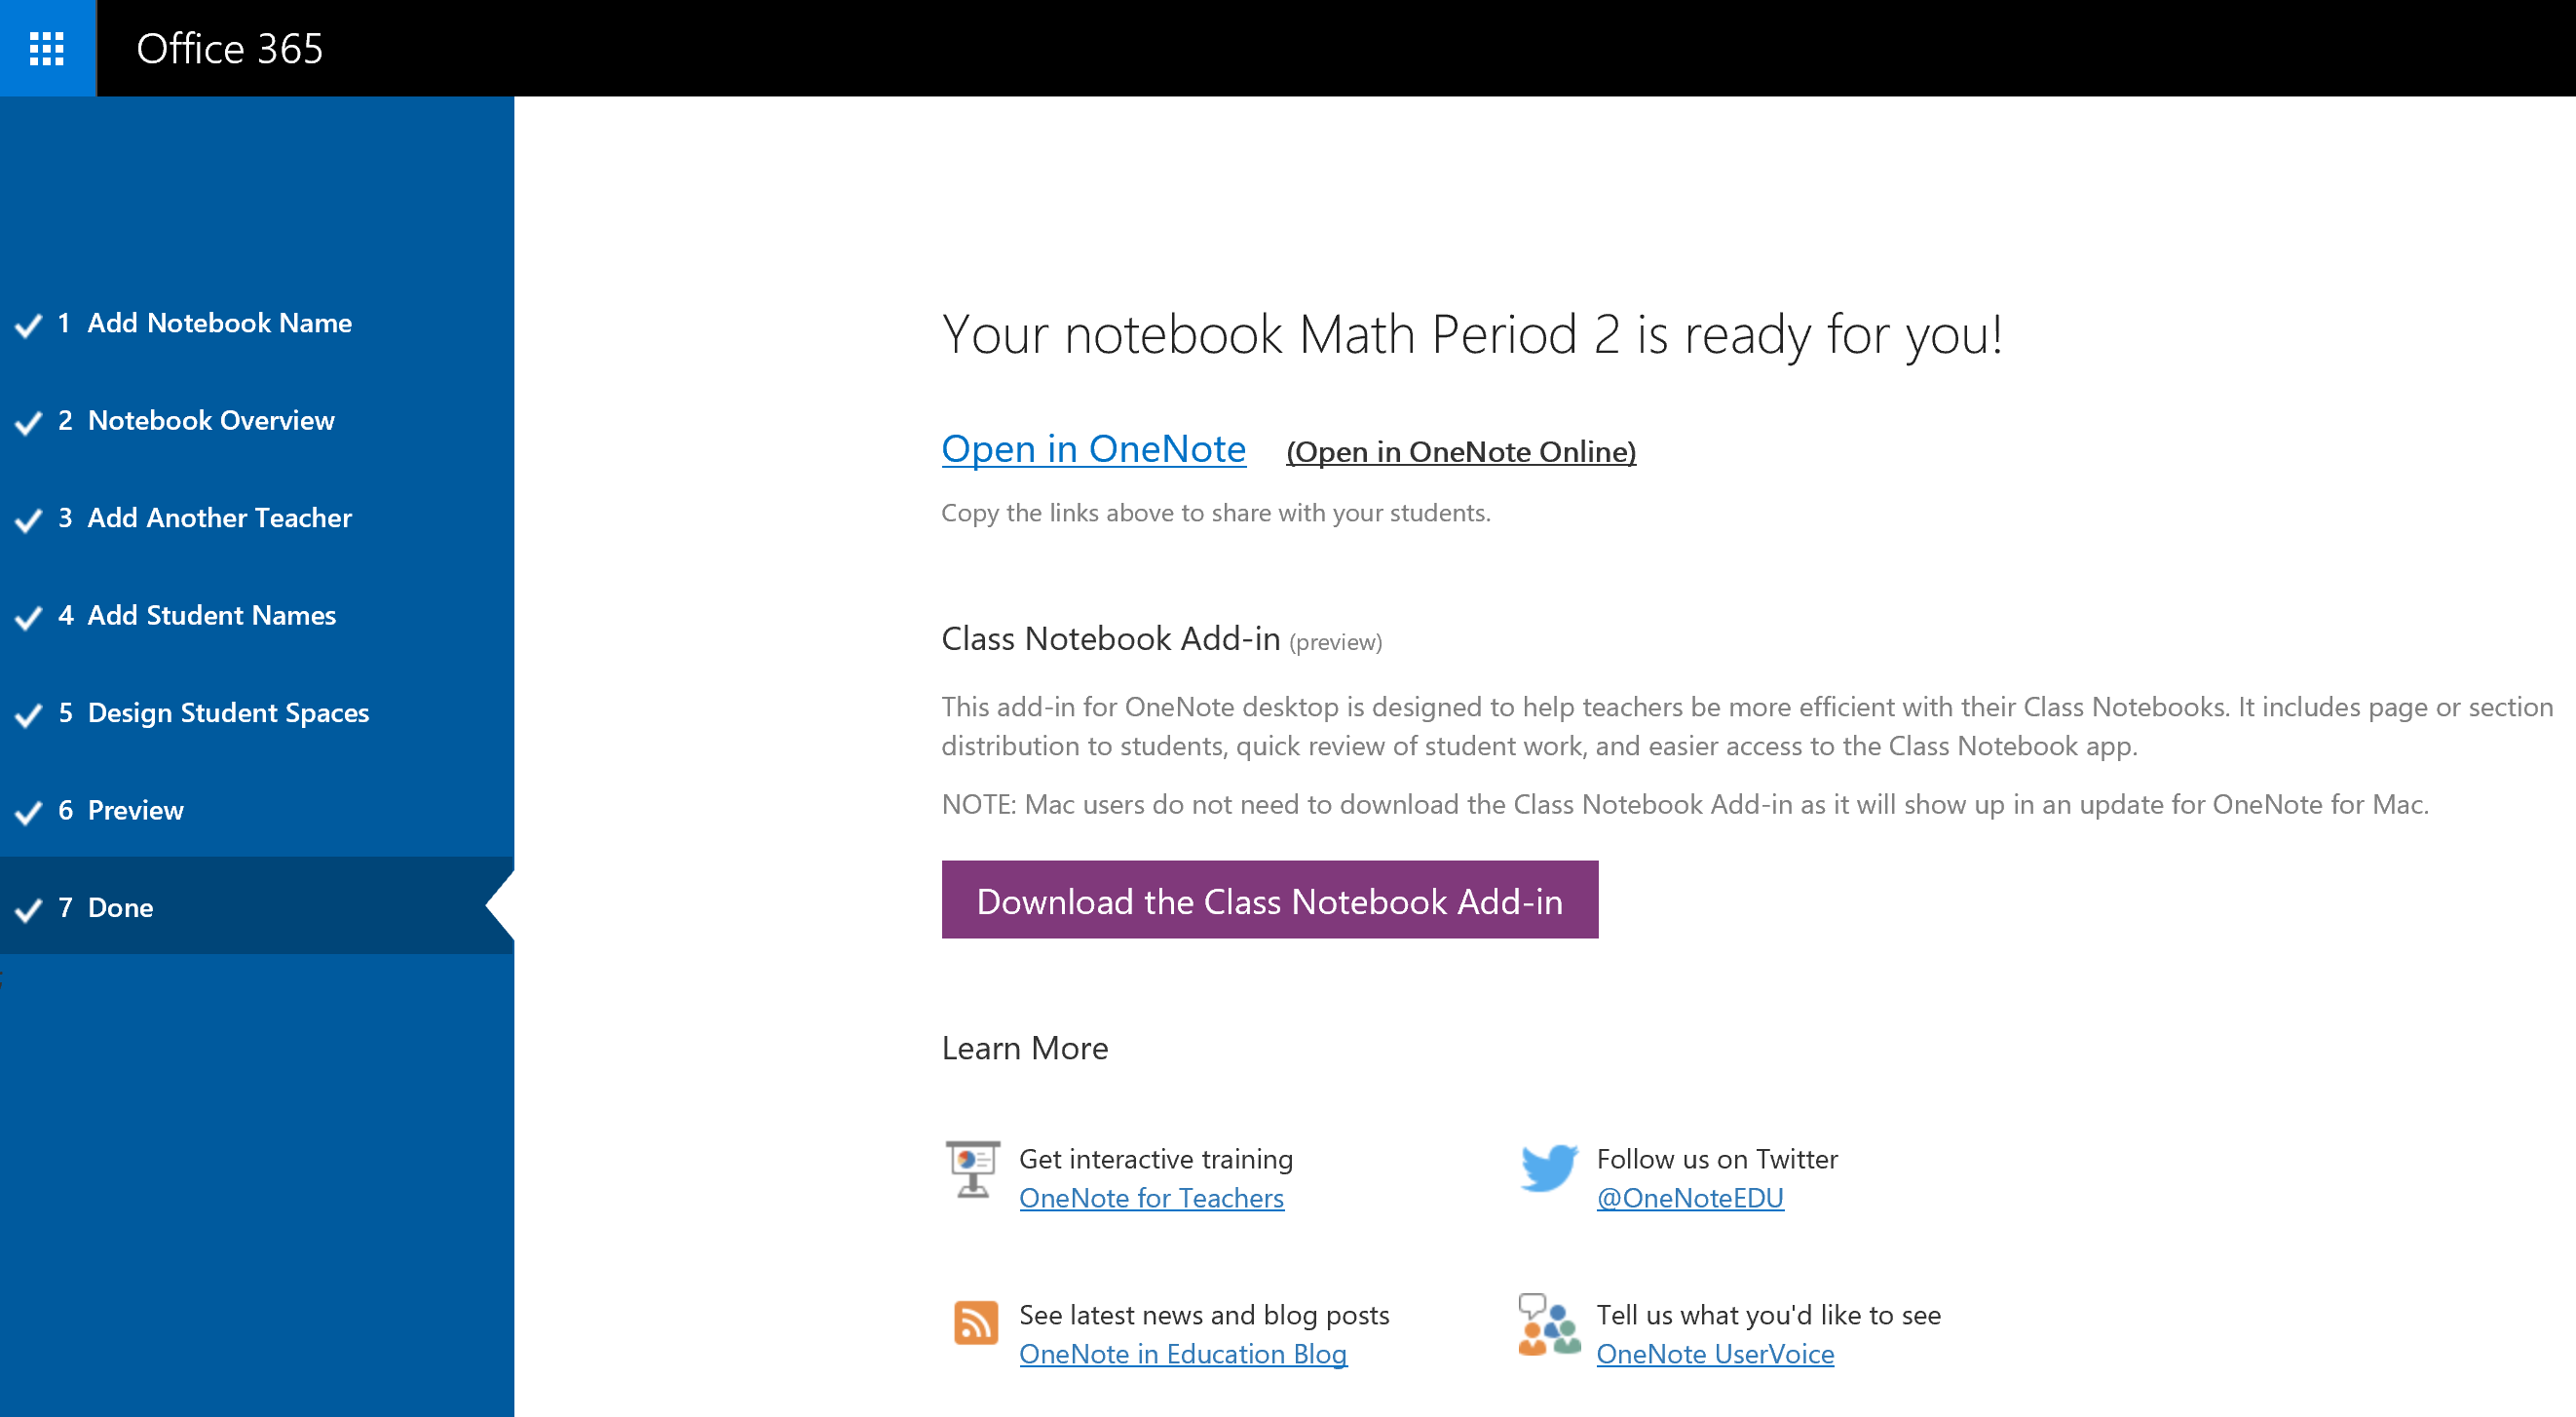 TIP You may wish to add content by placing it in the Content Library before inviting your students to open the class notebook. Keep a copy of the link in your records while you prepare the notebook, then share the link with the students when ready.
Get links to any class notebooks you haveTo find any link to a class notebook that you have, simply launch the app and click the Get Notebook links button. 
This will bring up a page that has all class notebooks created by you and a link to each one. Select the link, pressCTRL+C to copy it, and then paste the link into an email to your students. How can my students find a link to a class notebook?With the latest update to the app (version 3.0.0.0), we’ve made it easier for students to find their OneNote class notebook links in both OneDrive for Business and SharePoint Team Sites. OneDrive for Business If a teacher creates the class notebook in his/her OneDrive for Business or a SharePoint Team Site, it will automatically show up in the student’s Shared with me folder in OneDrive for Business. In this example, the teacher has created the "History 101 notebook and added all of the students in the class. When a student goes to his/her OneDrive for Business and looks under the Shared with me link, the History 101notebook automatically shows up. 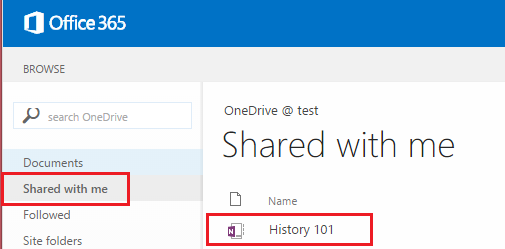
SharePoint Team Site Some schools have all teachers create class notebooks under a specific Team Site. If your school does this, the OneNote Class Notebook app will automatically add a Class notebooks entry in the Quick Launch navigation pane for SharePoint on the left side of the screen. 

|

